


Hybrid Networks – A Look at Extending On-Premises Networks to Azure
- Introduction
- Planning
- What is a Site-to-Site VPN?
- On-premises VPN device
- Virtual Network Gateway (VPN Gateway)
- Gateway SKUs
- Route types
- Gateway subnet
- Pricing
- Other components needed by Azure VPN gateway
- Local network gateway
- Connection
- Implementation
- Conclusion
TL;DR
In this post we are going to go over various components that are needed to successfully connect on-premises networks to virtual networks in Azure.
We will see different components that are used to successfully make a Site-to-Site VPN connection (such as Virtual Network Gateway, Connection etc.) and also explain a thing or two related to those components.
While explaining the concepts, we are going to implement a simple use-case scenario in which we leave the database servers running in our on-premises location and we migrate the web servers to Azure.
Introduction
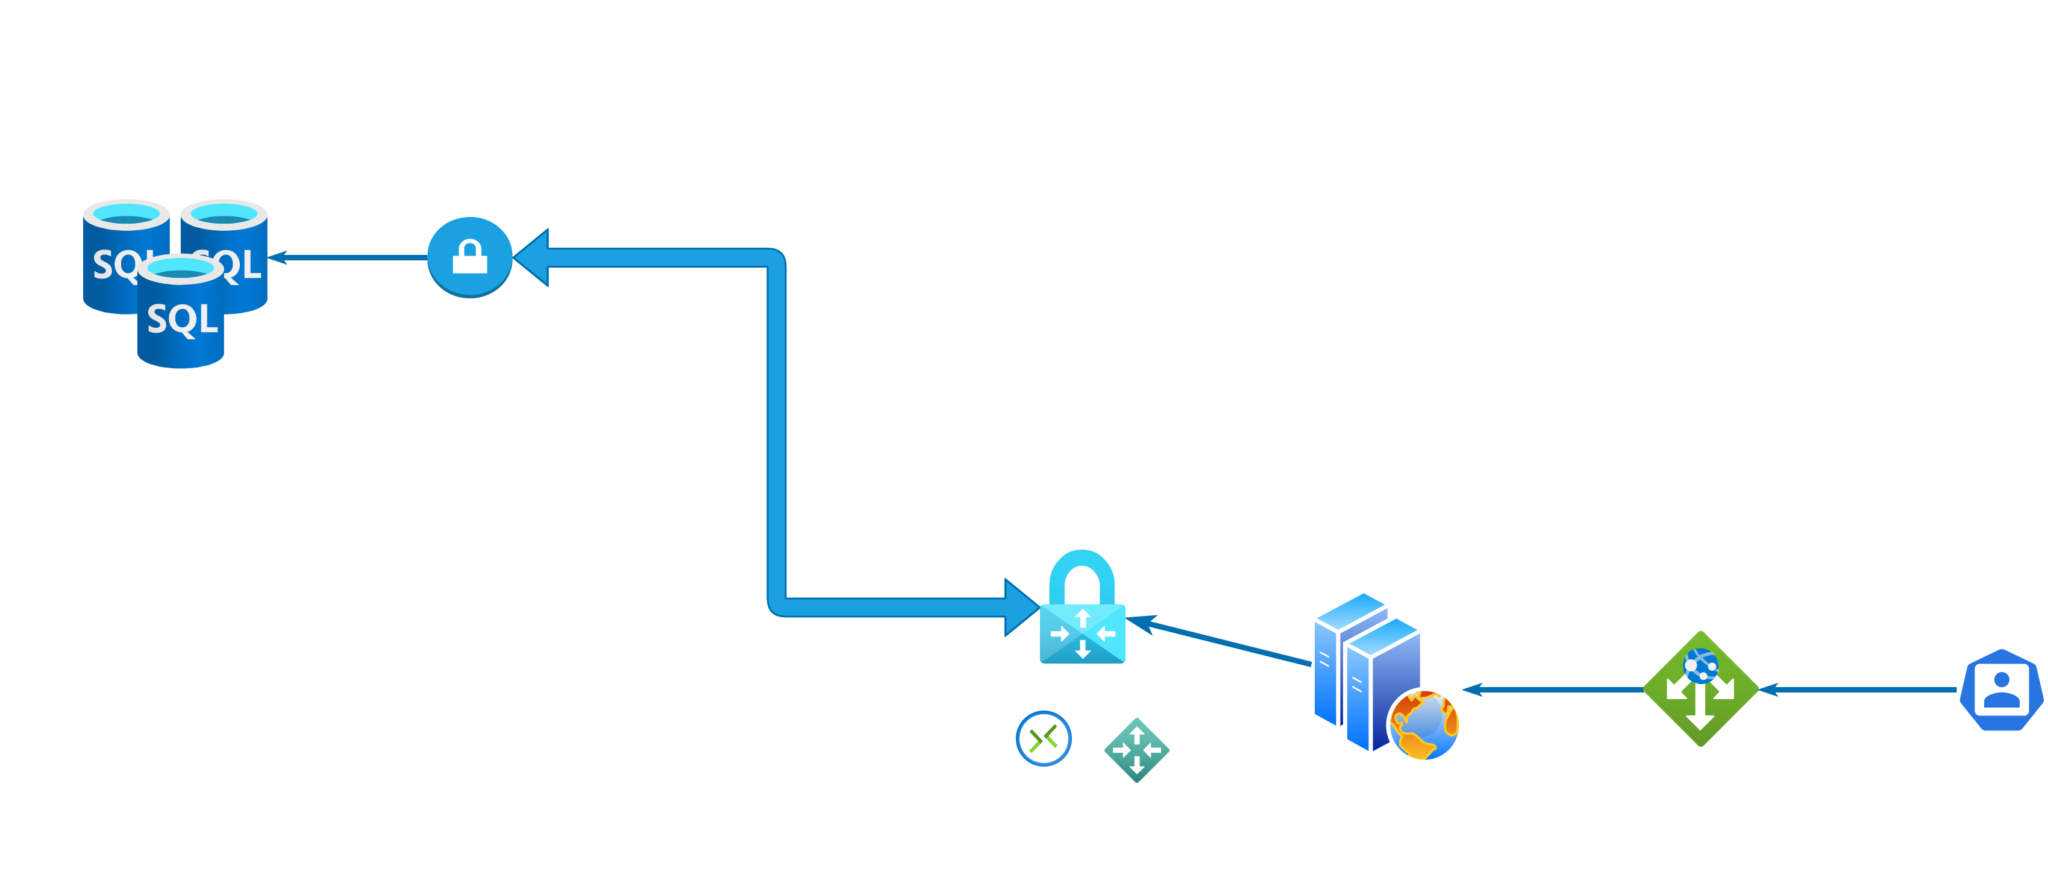
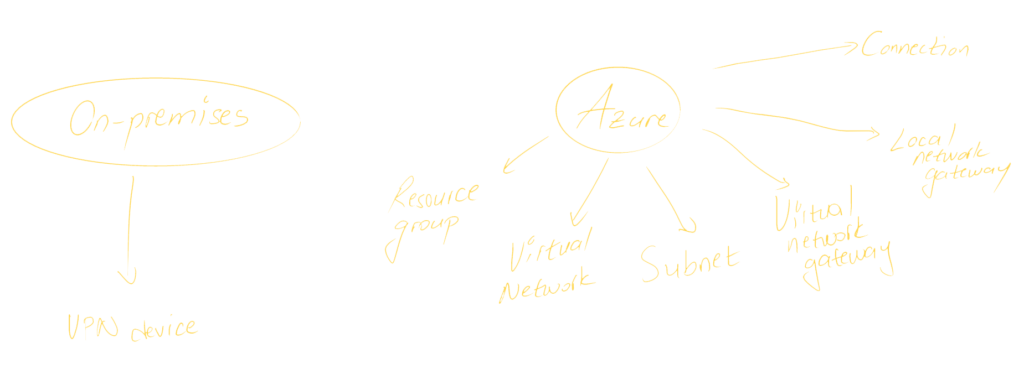
Before starting, let’s examine the following illustration:
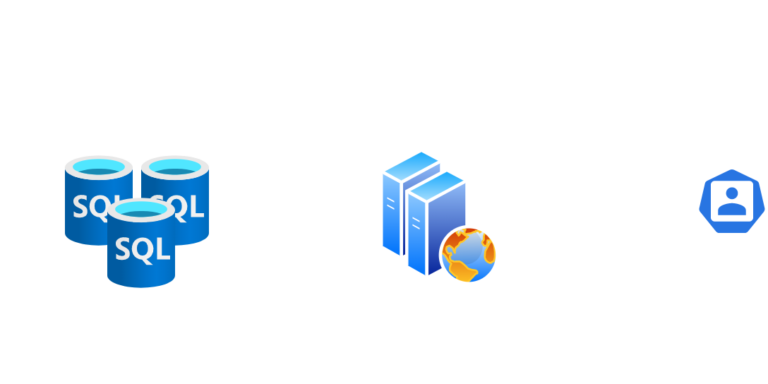
In our on-premises location we have some web servers which are used to host our web applications. These web servers communicate with the database servers on the back-end. The company has identified the need to migrate only the web servers to Azure and leave the database servers on-premise for the moment. Our task is to make sure that when web servers are migrated to Azure, they can communicate with the database servers.
Before starting with the implementation step, let’s review some of the core concepts and components that we will need in our solution:
A site-to-site VPN is a connection between two sites (networks). It allows those networks to communicate with each other through the public Internet in a secure and encrypted way. We are going to leverage this technology to connect our on-premises network with the virtual network in Azure, thus allowing the web servers to communicate with the back-end databases.
A site-to-site VPN requires two devices at each end of the connection. In our case (for a hybrid connection) we will use one VPN device at our on-premises location and another VPN device on our virtual network in Azure.
Before continuing further, make sure to research on the internet and check whether your on-premises VPN device is supported.
A VPN Gateway (most commonly known as a virtual network gateway) is a virtual device that is used to receive and send encrypted traffic between an Azure virtual network and an on-premises network via the public Internet.
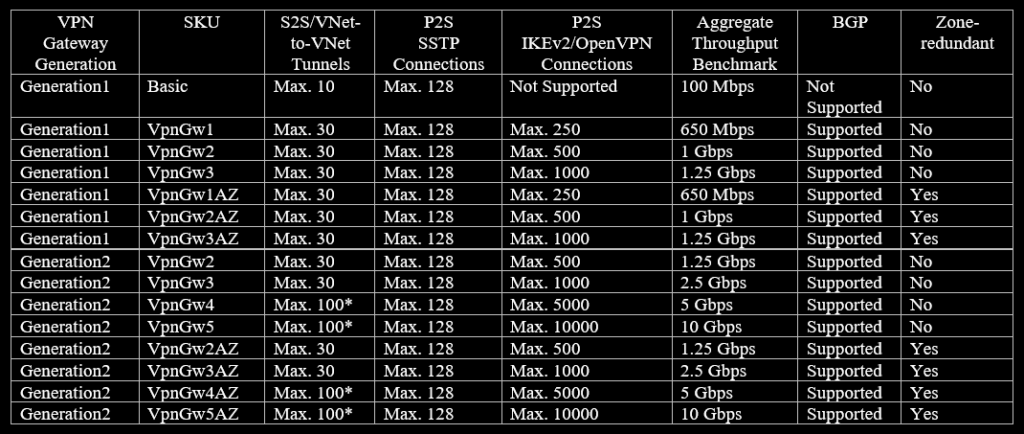
The main thing to look for when choosing a gateway SKU is the number of S2S/P2S connections supported, the maximum available bandwidth, and whether that SKU supports availability zones for high availability.
Another important concept that we need to decide on when creating a VPN gateway is the route type.
There are two route types:
Policy-based:
• Uses static route tables.
• Limited to 1 VPN connection.
Route-based:
• Uses dynamic routing protocols to automatically discover and update the route table.
• You can have multiple tunnels (S2S/P2S).
• Supports active-active configuration for high availability.
When you create a VPN gateway you need a separate subnet on your virtual network. All of the resources related to the VPN gateway (such as the underlying VMs) are placed in this subnet.
Things to keep in mind:
• The gateway subnet must be called “GatewaySubnet”.
• Never associate a Network Security Group (NSG) on the gateway subnet.
• Never place any other resource (such as VMs etc.) on this subnet.
• It is recommended that you create a gateway subnet of /27 or larger.
When you use a VPN gateway, you pay for the compute costs of the virtual network gateway and for the egress (outgoing) data transfer from the virtual network gateway. Ingress (incoming) data transfer is free.
It is a logical representation of our on-premises device in Azure. Here, we configure things related to our on-premises device such as:
• Public IP of the device
• Address space of the on-premises network.
After configuring both VPN devices (on-premises and in Azure), we configure a connection so that they can talk to each other.
Best practices when designing a hybrid connection:
•Ensure that the address spaces on-premises and the virtual network in Azure do not overlap.
•Ensure that you have a big enough VNet space on both sides.
•Choose your “GatewaySubnet” subnet range from the end of the virtual network’s address space. •Each virtual network can have only one VPN gateway (without counting ExpressRoute gateway).
Now that we have gone through the terminology related to VPNs, let’s go ahead and plan our infrastructure. We will need the following components:
On our on-premises location, we will use a Sophos XG Next Gen Firewall that will act as a VPN gateway.
On Azure, we will create the following resources:
• Resource group (webapp-prod-rg)
• Virtual network (webapp-prod-vnet)
• Subnet (webapp-prod-snet)
• Virtual network gateway (corporate-vpngw)
• Local network gateway (corporate-vpngw-lng)
• Connection (corporate-vpngw-con)
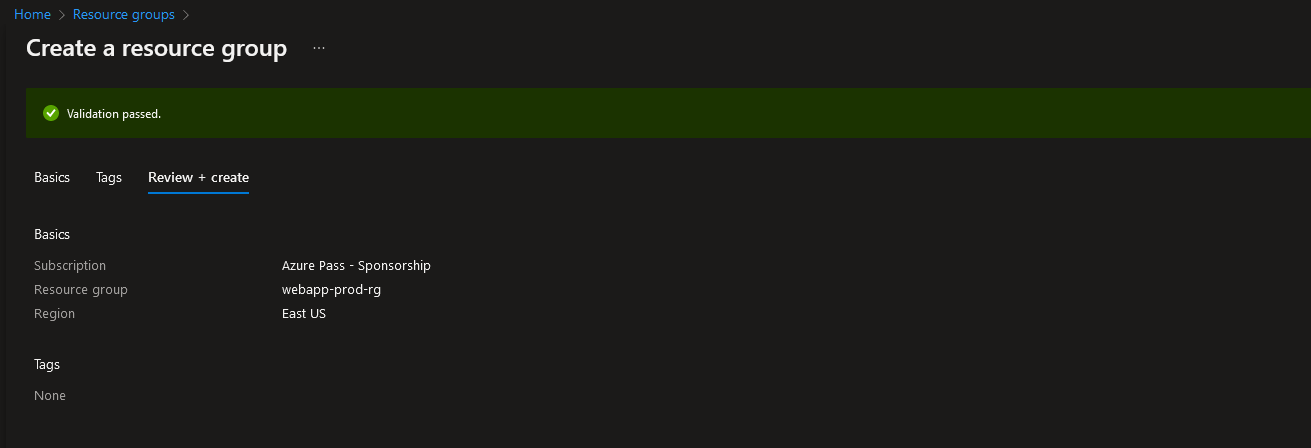
We start by creating the resource group, which will group our resources together for easier management. To create a resource group navigate to:
1. Resource groups
2. Click on “+Create”
3. Specify the resource group name and location
4. Finish
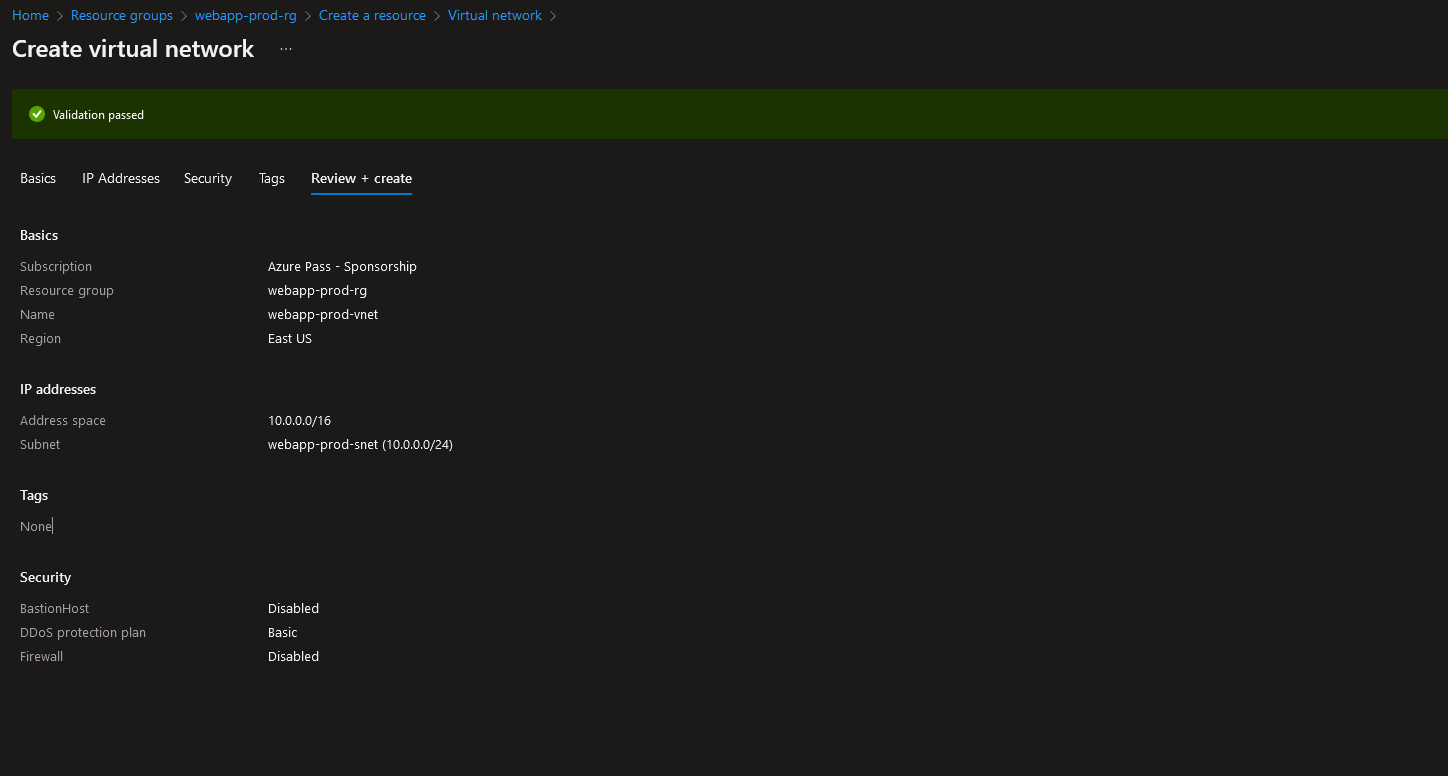
Continue by creating a virtual network and the subnet for the web servers. To create the virtual network and the subnet navigate to:
1. The newly created resource group “webapp-prod-rg”
2. Click on “+Create”
3. Search for “Virtual network” and click on “Create”
4. Specify the following settings:
• Resource group (should be automatically selected)
• Name
• Region
• IPv4 address space
• Subnet name and range
5. Leave other settings unchanged and click on “Create”
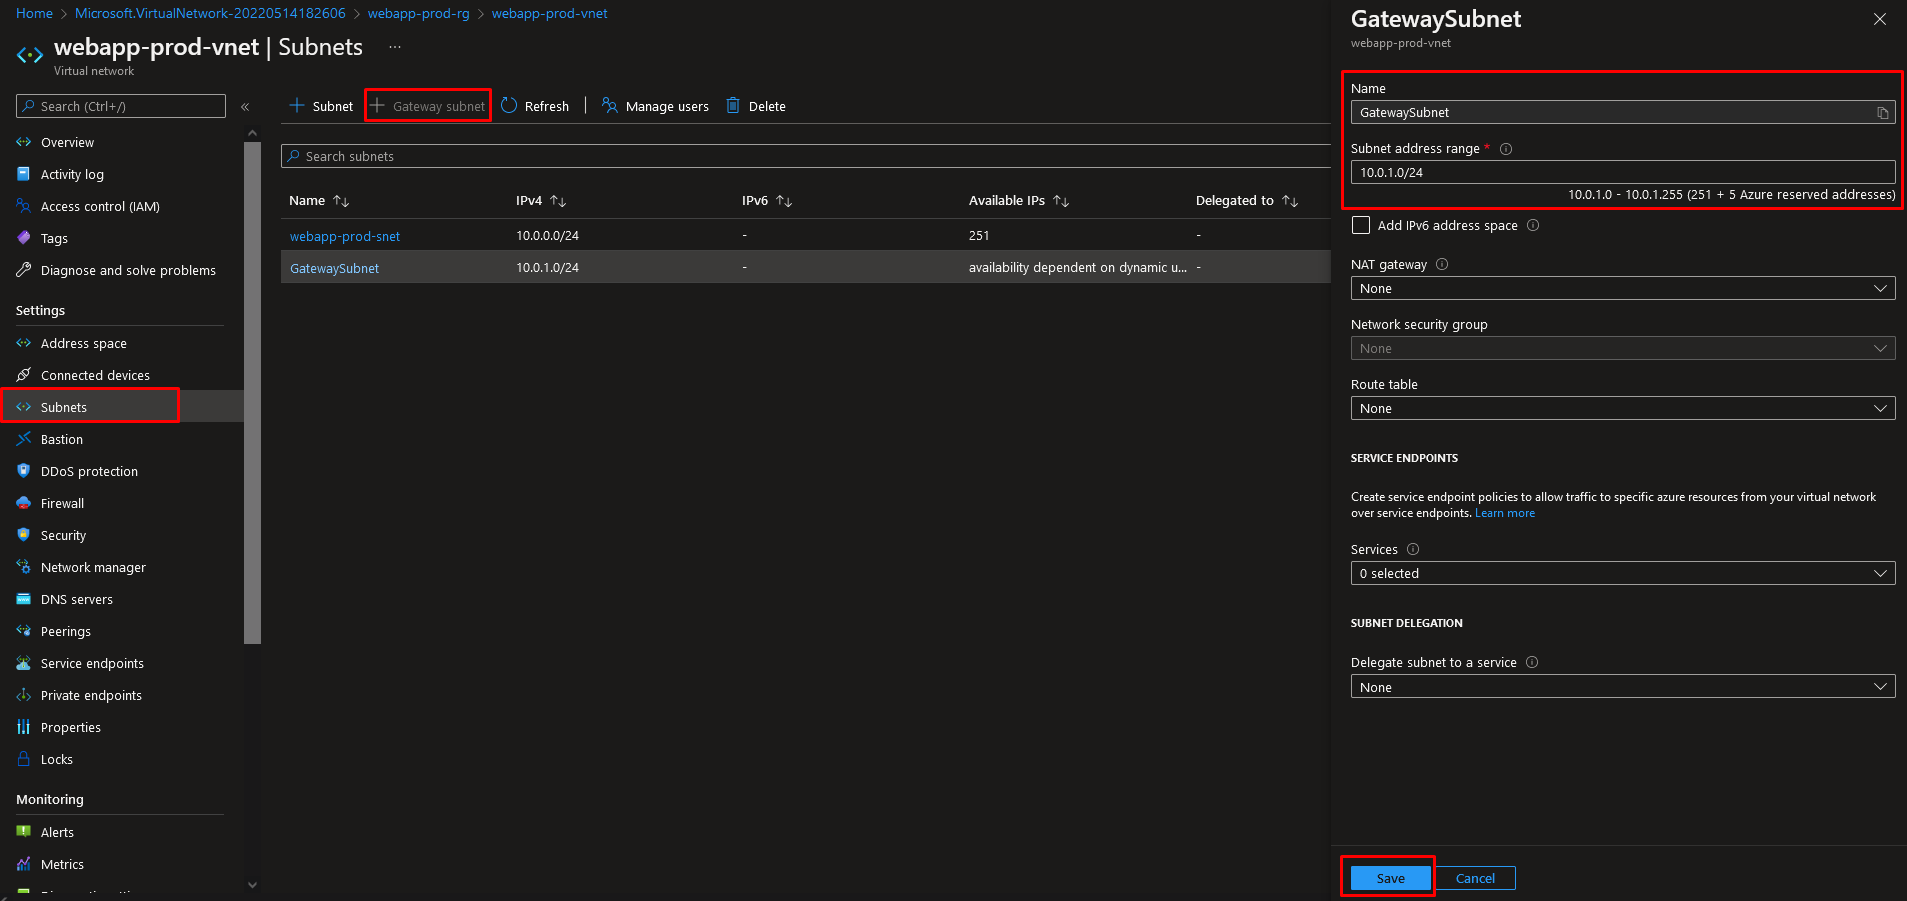
After the virtual network deployment has finished, we will need to create the gateway subnet called “GatewaySubnet”. To create the subnet, navigate to:
1. The newly created virtual network “webapp-prod-vnet”
2. Under “Settings” choose “Subnets”
3. Click on “+ Gateway subnet”
4. Change the subnet address range if needed (notice you cannot change the name)
5. Save the changes to finish creating the subnet
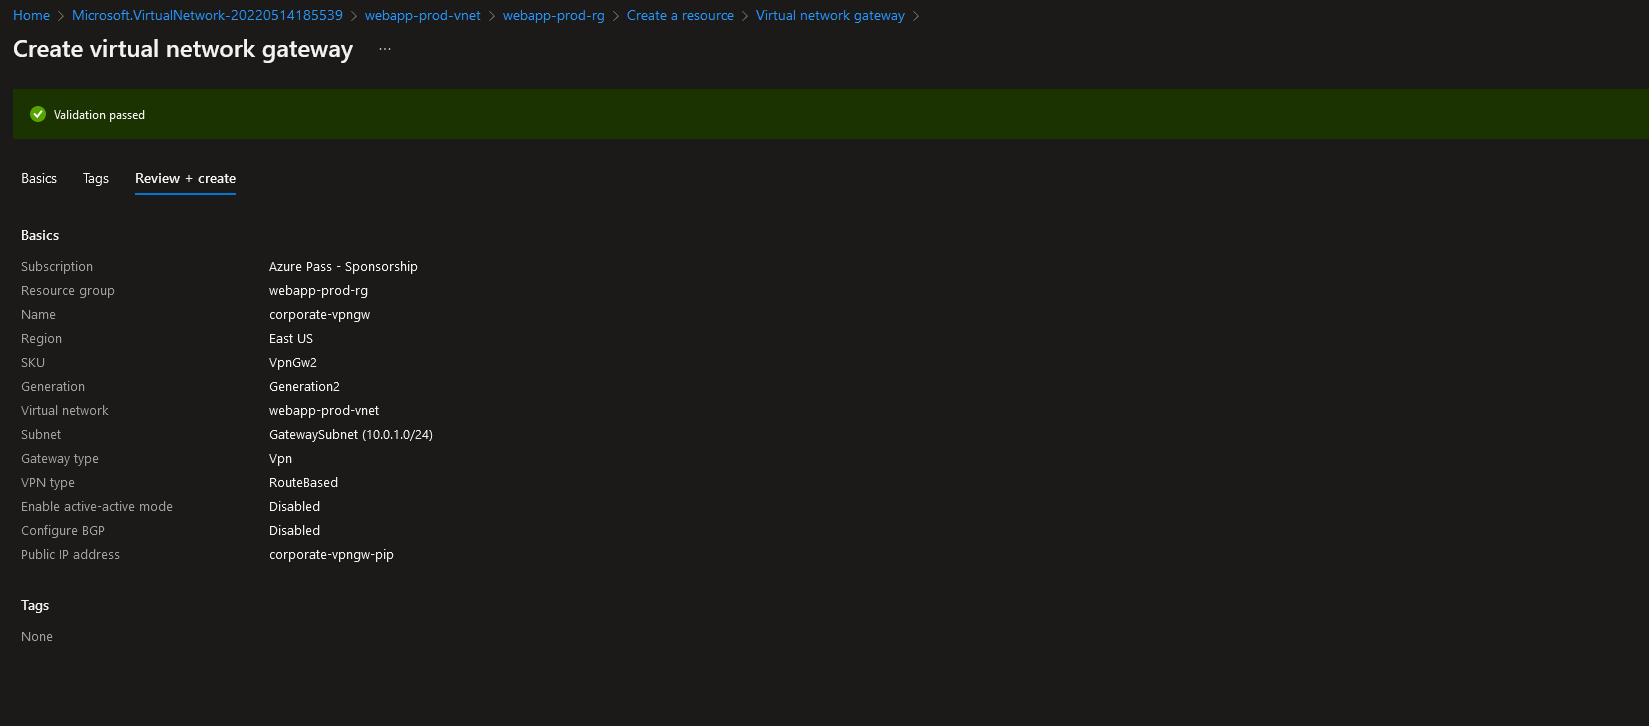
We can finally start with creating the virtual network gateway. To create a virtual network gateway, navigate to:
1. The resource group “webapp-prod-rg”
2. Click on “+Create”
3. Search for “Virtual network gateway” and click on “Create”
4. Specify the following settings:
• Name
• Region (it is important to choose the same region as the virtual network)
• Gateway type “VPN”
• VPN type “Route-based”
• SKU “VpnGw2”
• Generation “Generation2”
• Virtual network “webapp-prod-vnet”
• Subnet should be automatically set to “GatewaySubnet”
• Specify a name for the Public IP address
5. Leave other settings unchanged and click on “Review + Create”
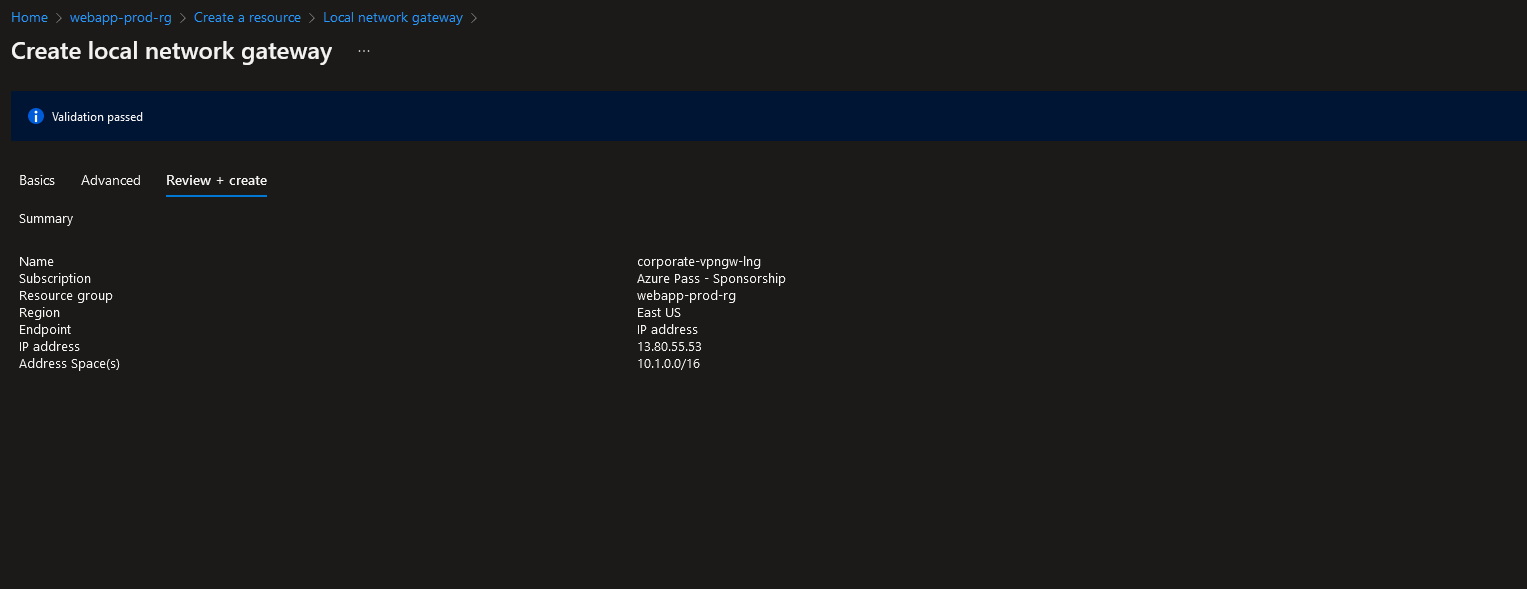
The last step that needs to be performed on the Azure side is to configure the Local network gateway and the Connection itself. To create a Local network gateway, navigate to:
1. The resource group “webapp-prod-rg”
2. Click on “+Create”
3. Search for “Local network gateway” and click on “Create”
4. Specify the following settings:
• Region (the same region as your virtual network gateway)
• Name
• Endpoint (choose IP to specify the public IP address of the on-premises VPN device. You can also choose an FQDN)
• Specify the public IP address (or the FQDN)
• Enter the on-premises address space(s)
5. Leave other settings unchanged and click on “Review + Create”
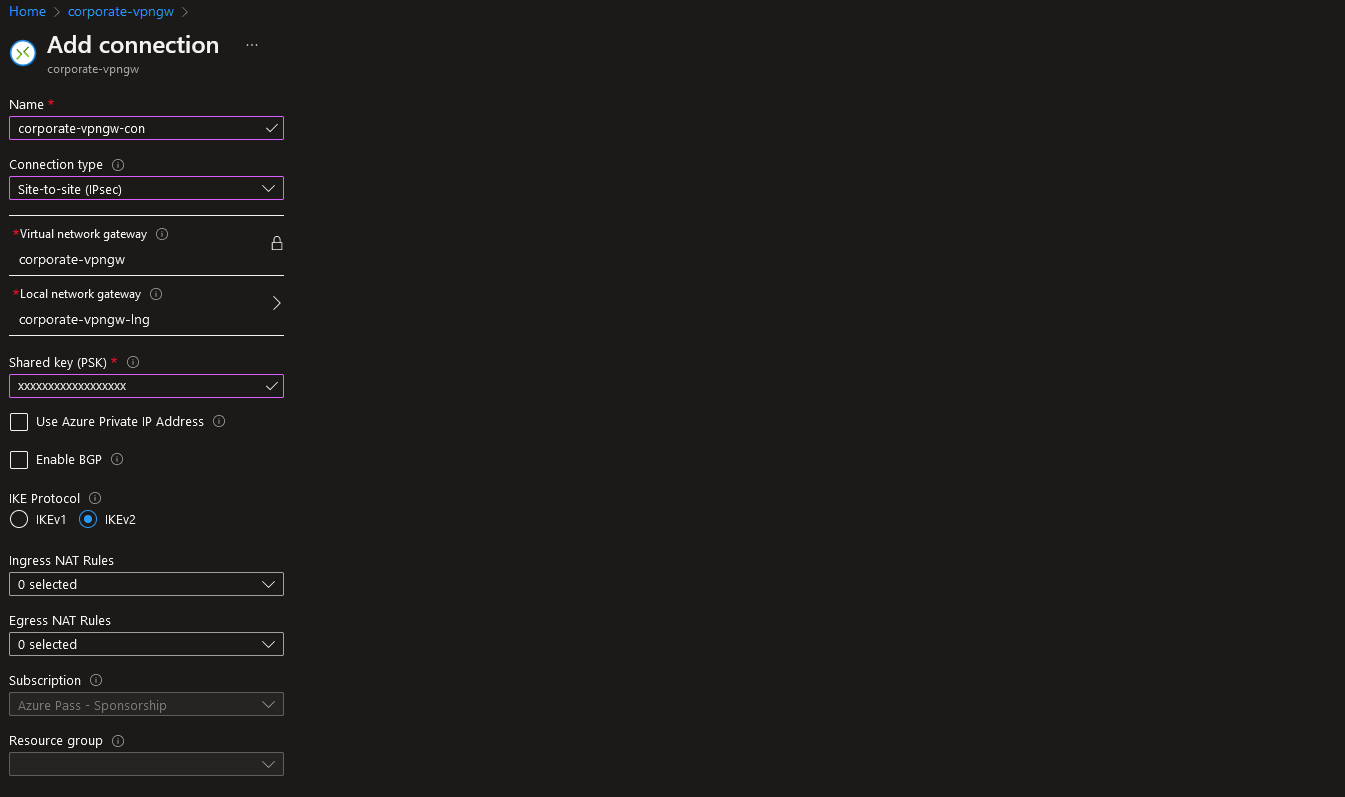
To create the connection, navigate to:
1. The Local network gateway that we created “corporate-vpngw-lng”
2. Under “Connections” click on “+ Add”
3. Specify the following settings:
• Name
• Connection type (it is automatically selected if you create the connection from within the local network gateway)
• Choose the virtual network gateway
• Specify a PSK (Pre-shared key)
4. Leave other settings unchanged and click on “Review + Create”
The last step of this entire process is to configure the on-premises VPN device. I won’t go over the process of configuring this device since it is specific to the model itself. To configure it you will need the Public IP of the VPN gateway on Azure and the PSK (pre-shared key) that you specified on the connection.
If everything is configured correctly, then you should see a status of “Connected” under the connection:
